The Import and export capabilities are one of the major features in Document360 which helps the user to create an Article and their Categories for their documentation in one project from the existing project without re-creating it manually. In this Blog, we are going to see how to export and import the project documentation within Document360.
Let’s say you already have one project with all documentation in proper structure. Now you need to create another knowledge base for your new customer with similar documentation and slight changes in it but with a different theme and project settings.
In this case, if the user clones the project, then a new project is created of course with similar documentation, but all the theme and settings configuration will be the same as the source project. The user has to go and change all configurations based on their new customer’s need which adds one more unnecessary step for them.
Document360 allows you to get this done quickly by exporting the documentation from an existing project and importing it to a new project created for that customer which has different project settings.
Export Documentation as .zip
When you try to export your project documentation, all the article’s content will be exported for both Markdown and WYSIWYG in the Version, Language, and time period level folder. If you require the media files in the article, these will be exported in a separate folder. All these contents will be ready to download as a compressed .zip file.
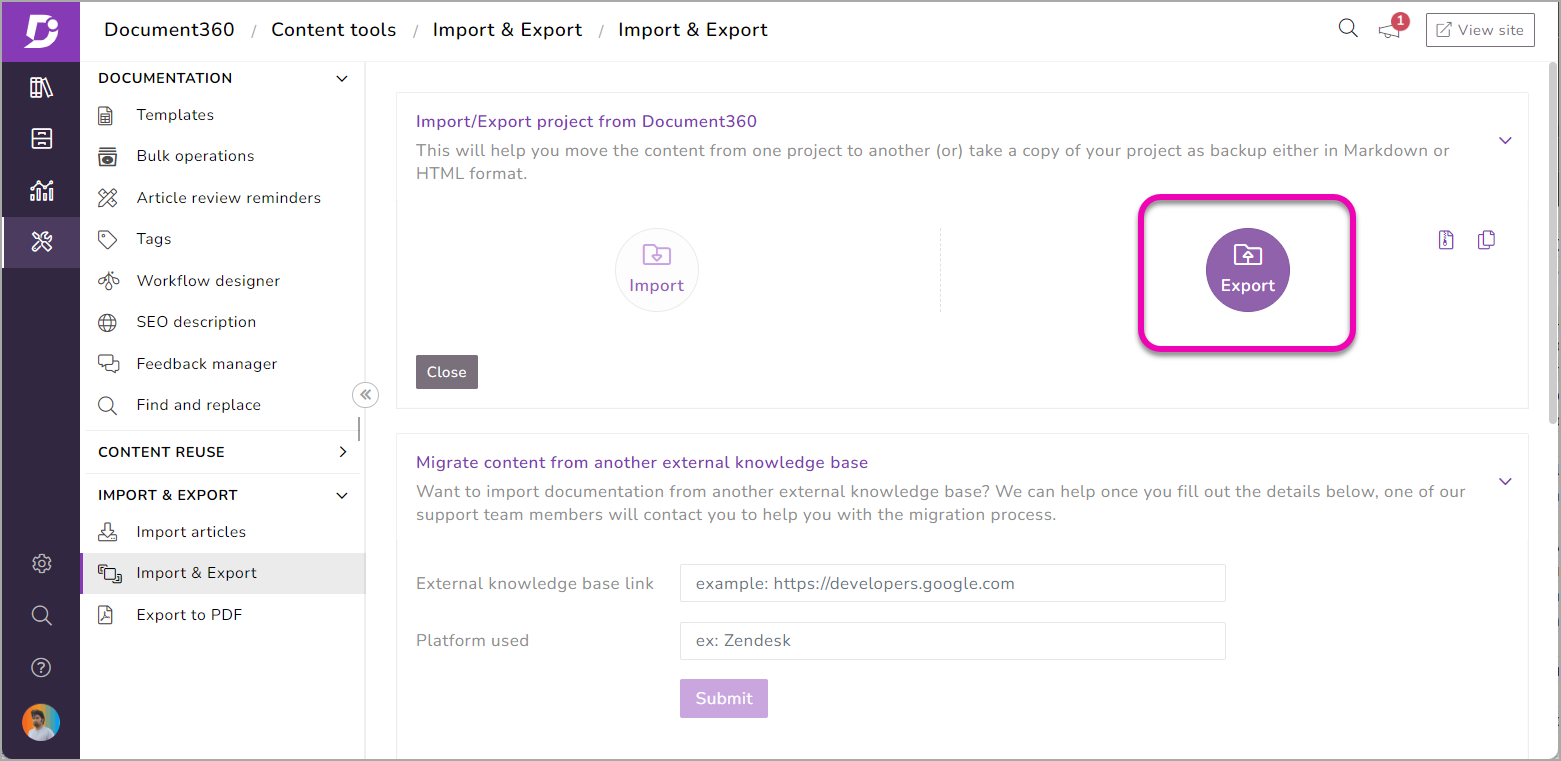
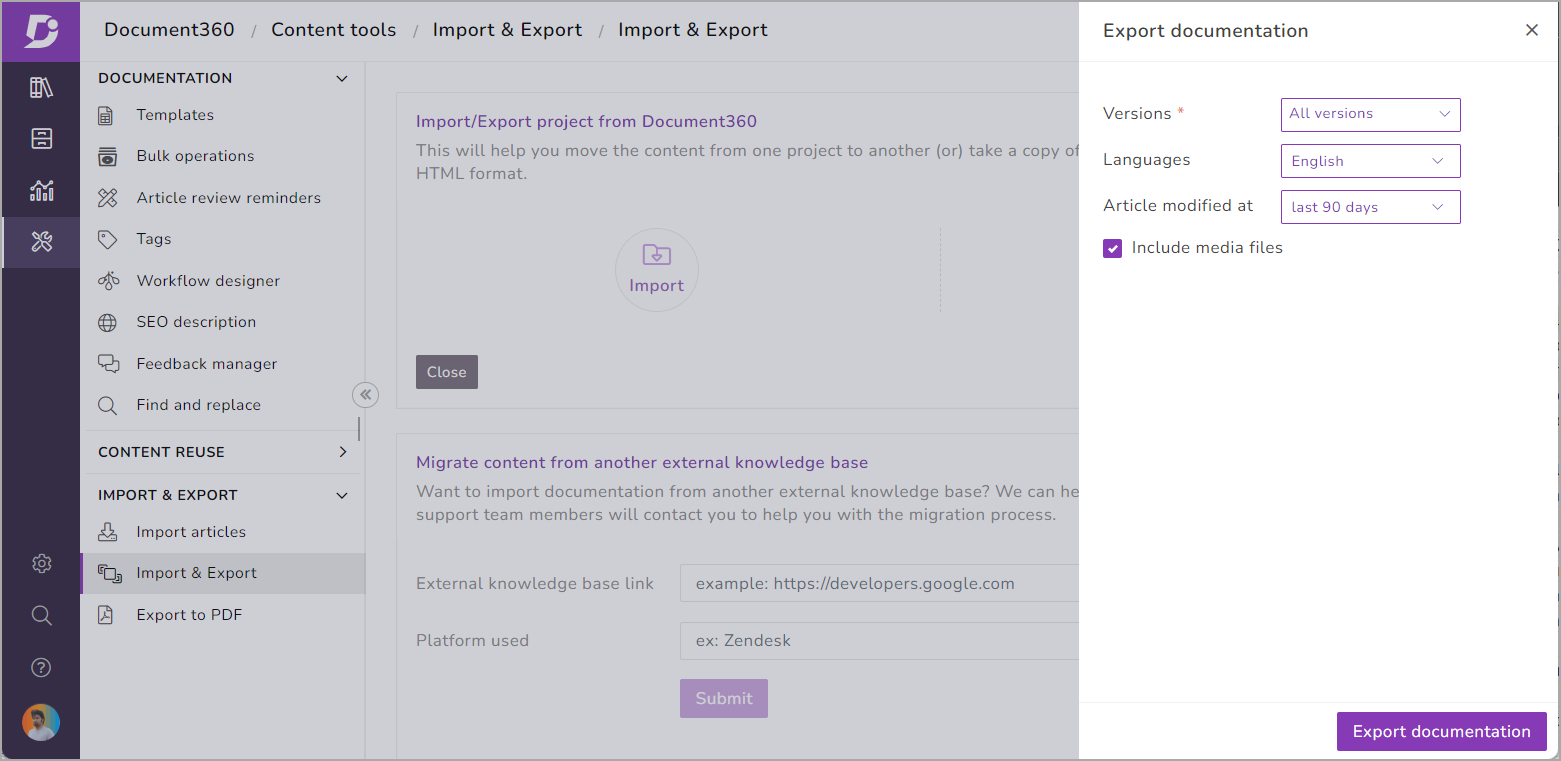
To export your documentation, go to Content tools > Import & Export > and click the “Export” button. A blade window shows you the export selection such as version, language, time period, and include media files selection. Click on the ‘Export documentation’ button, and the export process runs in the background.
Once this background process is completed, you will see two new icons appearing in the right corner of the Export Documentation section.
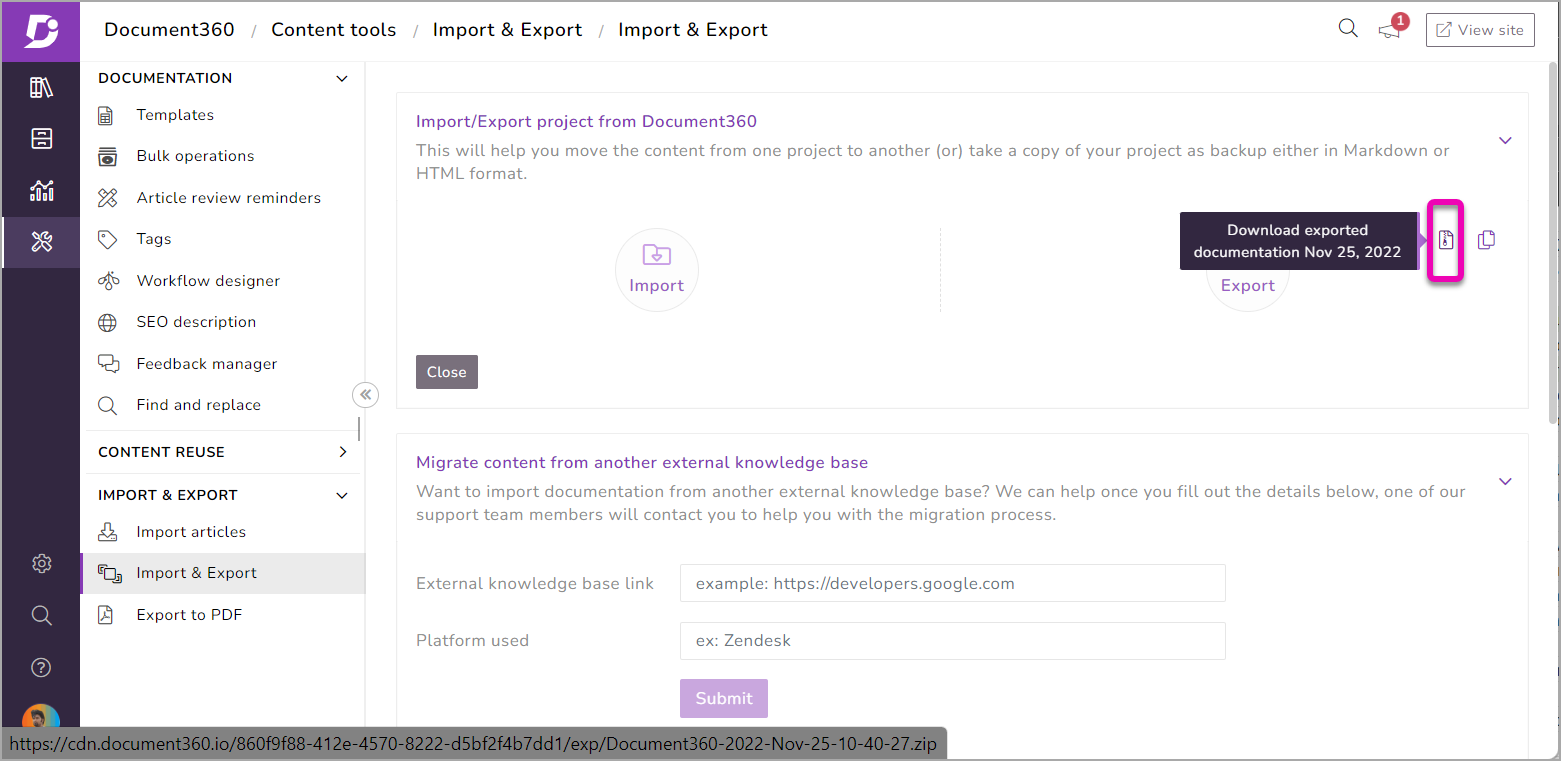
Document360 allows you to download the exported documentation in two ways
1. Download the exported Documentation – You can directly click the icon to get the latest exported documentation in .zip format
2. Copy the Download link – you can copy the download link and send it to a team member of the different project to download the file and import the documents into their projects.
Import Documentation:
The exported documentation file can be imported into any project. Articles in the exported file will be imported into an existing category in the destination project if the project has a category with the same name.
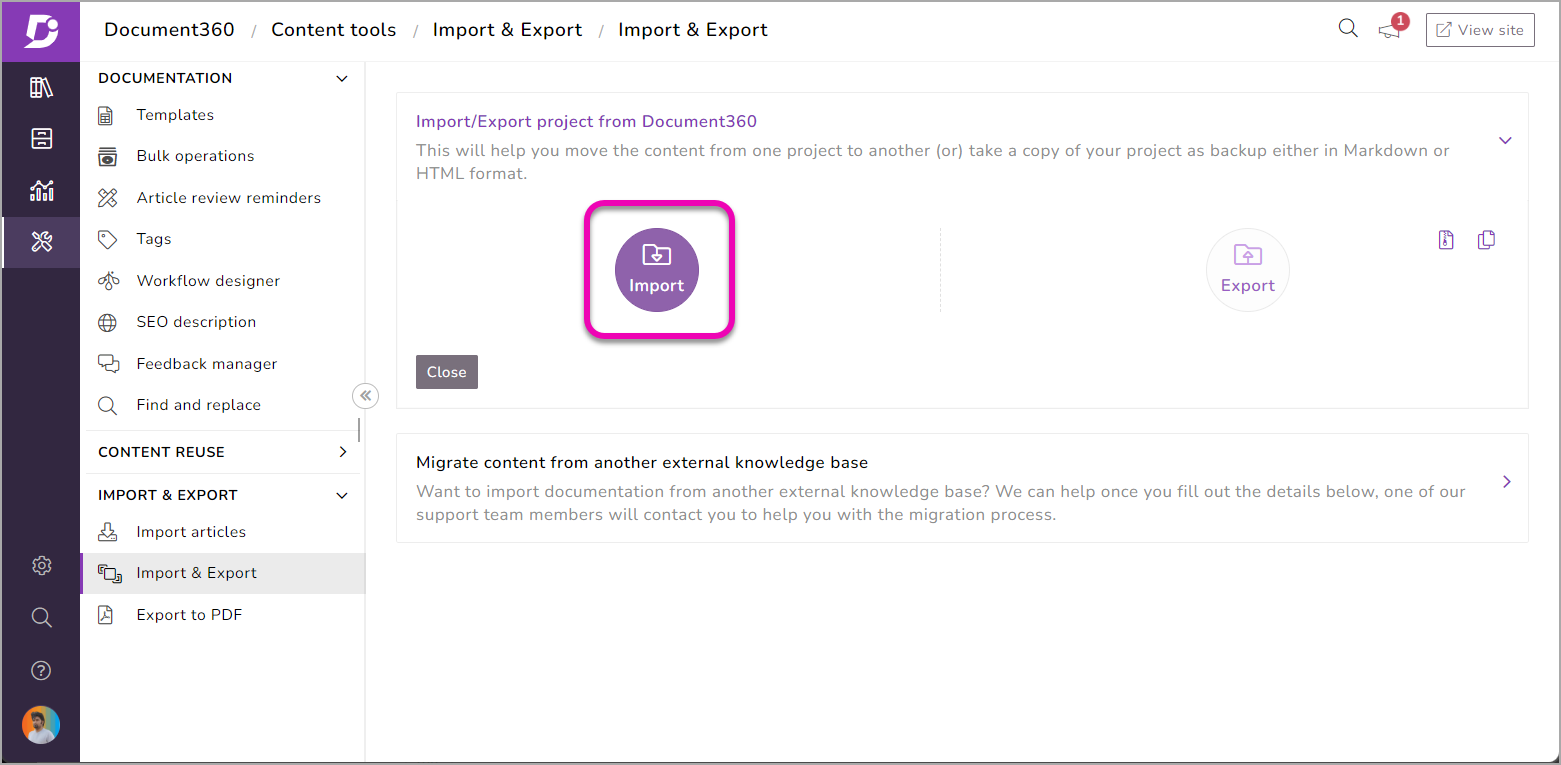
To Import documentation, go to Content tools > Import & Export, and click the “Import” button. When you click the Import button, a new blade will open where you can upload the Document360 exported file. Once you upload the file, the steps involved in the import process will be displayed with the status.
1. Uploading zip file
2. Validating zip file
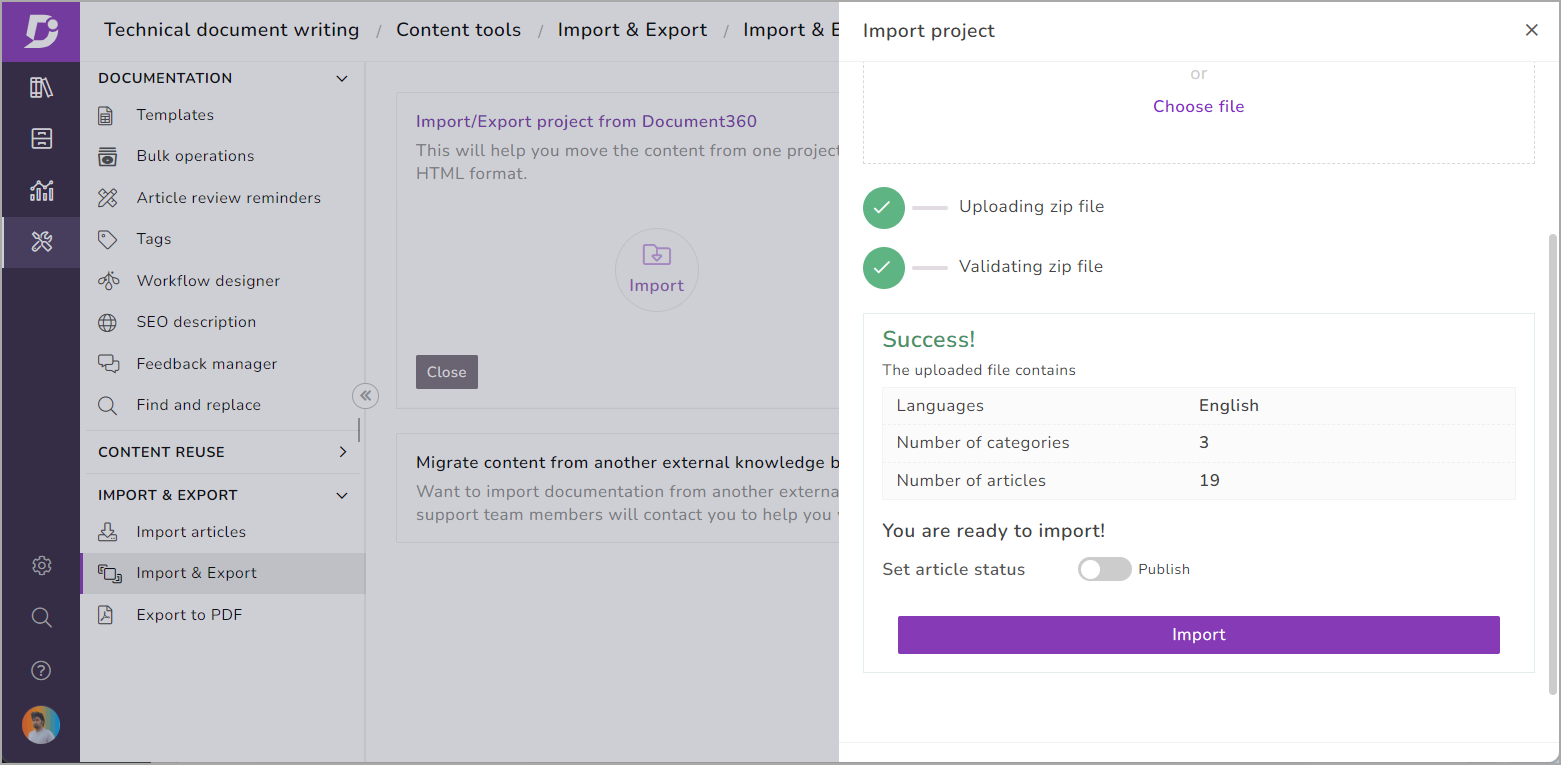
If the uploaded zip file is valid, the number of categories and articles in the zip file will be displayed. Using the toggle available, you can choose your article status after the export (Draft or Published). Click on the ‘Import’ button.
Articles in the exported file will be imported into the existing category if the destination project has the same name in the category section.
An intuitive knowledge base software to easily add your content and integrate it with any application. Give Document360 a try!
Get Started
Based on the file size, it will take a few seconds to minutes to complete the import process which will run in the background so that you can go to other sections and come back. Once the import process is completed, it shows the imported status with the number of categories and articles imported along with an Errors message (if any). You can also see the latest imported log information by clicking the icon that appeared after the import process completed
Export to PDF
Portable Document Format (PDF) is a universal format used for data transfer between different applications. Many applications support exporting content into PDFs such that it facilitates reliable data exchange independent of software, hardware, and operating system.
If you are planning to migrate from one platform to another, PDFs can also be used for data migration and archiving purposes. There are a few use cases that exist for converting content to PDFs namely
- Sharing content from proprietary software to other software platforms
- Sharing content with rich images and standard typefaces
- Digitally sign PDFs that can be used for legal and compliance purposes
- Migration from one platform to another
At Document360, we understood the need to export your knowledge base into PDFs to suit your use cases. Document360 support exporting your knowledge base project into PDFs. Those export PDFs can be password protected for additional security.
To access this option go to Content tools > Import & Export > Export as PDF. You can find two tabs here ‘Content templates’ and ‘Design templates’.
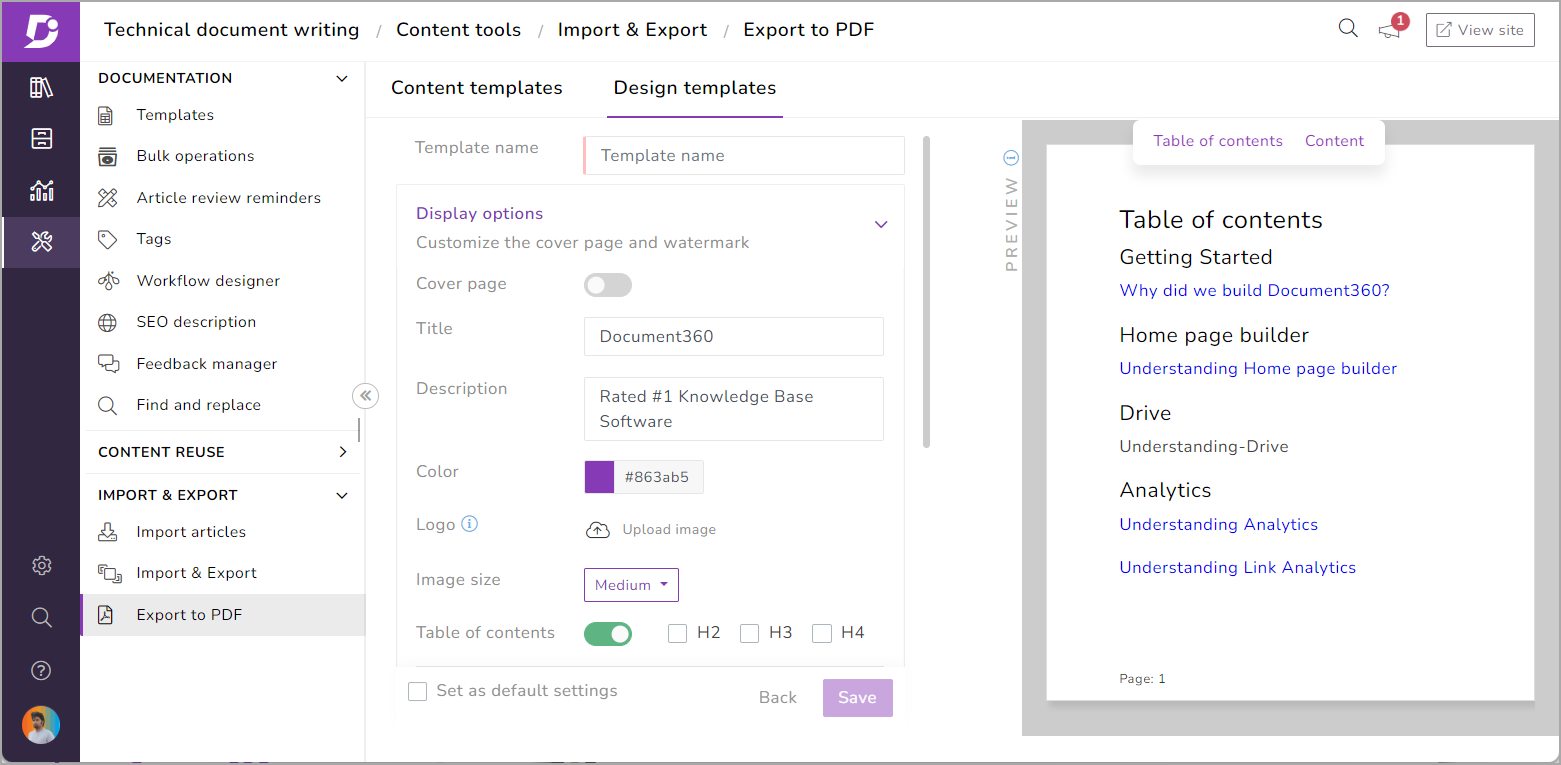
Document360 also provides various ‘Content template’ settings for PDF generation. The cover page and table of contents can be added as per your requirements. Document360 provides you two options: image as a watermark or plain text as your watermark if you need to embed a custom watermark to protect your copyright. All these settings can be previewed before the actual PDF generation to verify your settings. The layout of the PDF can be configured as portrait or landscape along with different margin settings.
However, to specify these design preferences, you can use the ‘Design template’ tab. Create a custom PDF design template that can be used to style the PDF to be exported. Users can configure the visual aspects like the cover page, table of content, watermark, layout, header & footer, and font settings.
Headers and footers of the PDFs can include images and page numbers, respectively. Both header and footer can be aligned to the center, left, and right. Furthermore, font face, color, and size can also be configured to suit organizational brand guidelines. Once you are done with your design, you can save the design template and use it any number of times in the future while exporting.
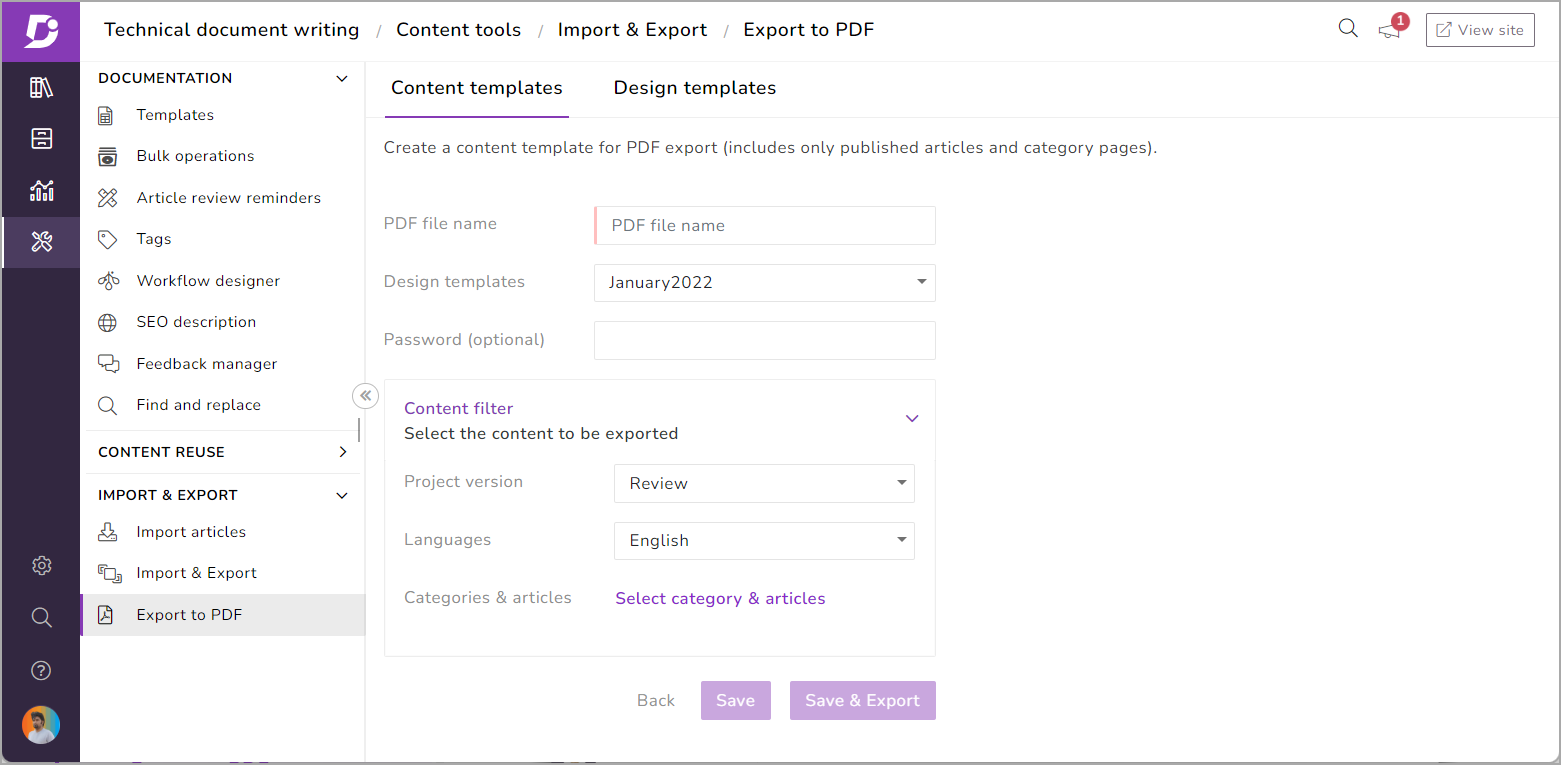
Coming back to the ‘Content templates’ tab, this is similar to the design templates but instead of the style elements you choose the content elements in the Knowledge base project that goes into the PDF.
Check out the below tutorial video:
How to export your knowledge base content to pdf using Document360
Schedule a demo with one of our experts to take a deeper dive into Document360
Book A Demo


 –
– 