
Having a unified place to store all your files such as images, videos, docs, and more is quite handy when you think about it. And Document360 users have been utilizing the existing in-built File manager all this time.
But we wanted to give our customers the absolute experience that they might enjoy from any major cloud-based file management platforms like Dropbox, OneDrive, Google Drive, and more.
We set out to develop and update our existing file management system. After a ton of R&D and feedback from our customers, we’re rolling out the new and enhanced Document360 Drive.
The Document360 Drive elevates the experience and optimizes the way you organize, view, access, backup, and manage all the files and folders in a unified hub.
So, what is Document360 Drive?
Well, it’s simply a central cloud-based storage repository for Document360 customers to manage all files operation. If you have already used any other heavyweights such as Google Drive or OneDrive, getting used to all functions in Document360 Drive would be easy.
A structured file management system is very much required in any online business; well it’s of prime necessity when you consider an online knowledge base. Storing all your digital assets in a single entity would make it easier and streamline your data management practices.
Feature walkthrough
Here’s a quick walkthrough of the new Document360 Drive. You can easily access it from your project dashboard by clicking on the Drive icon from the left menu bar.
Also Read: How to store & manage knowledge base files with the new drive
#1 Adding a new folder
When you’re in the drive’s main directory, just click on the ‘New folder’ option on the top right, type in the folder name, and click on Create button.
Pro tip: When you create folders for your knowledge base files, it would be easier to navigate and maintain files if the folders were in line with the categories and sub-categories of your knowledge base.
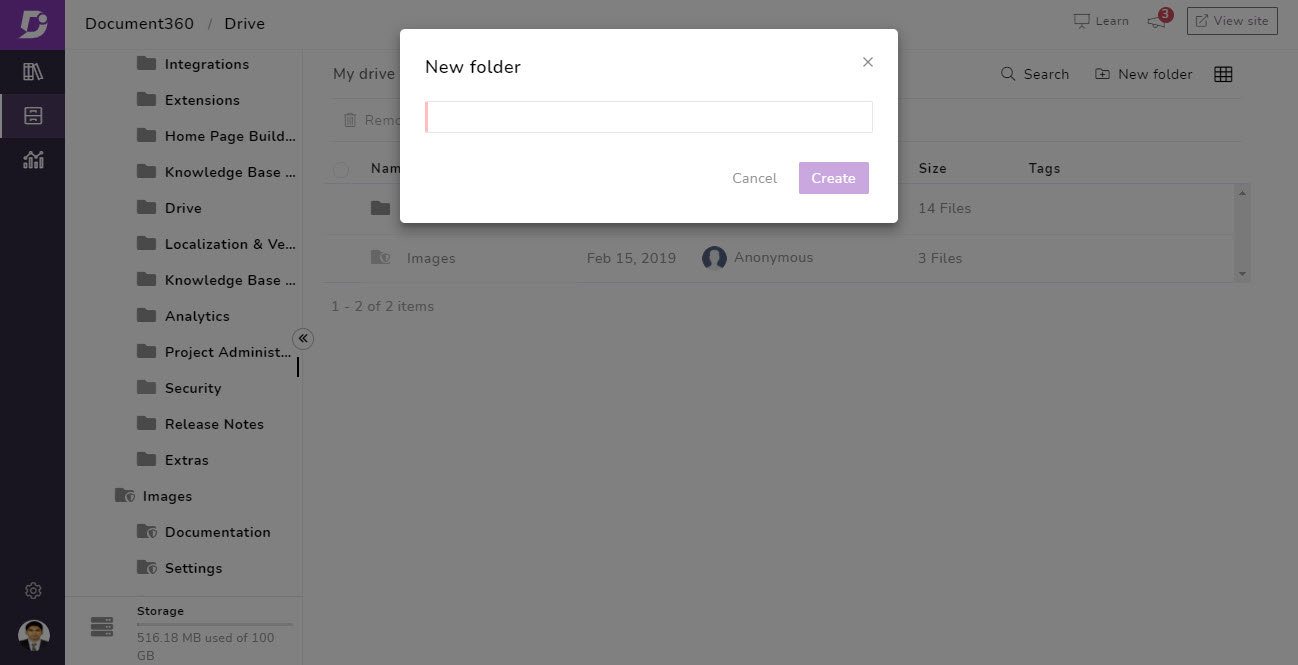
Another easy way to add a new folder is using the left navigation bar. You can find the working similarity to the category view in the documentation window of your knowledge base. You can hover the mouse pointer over the space between folders in the left navigation bar, click on the + sign that appears, type in your folder name and click on create.
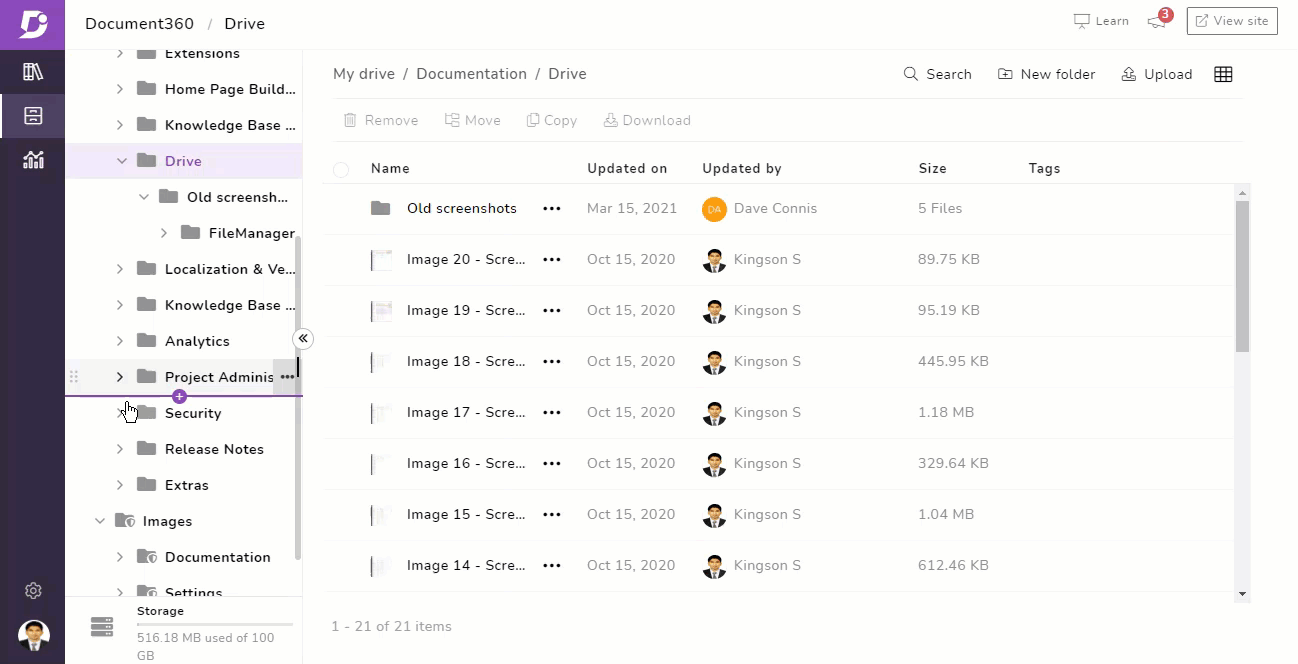
#2 Adding subfolders and files
Now that you’ve created a few main folders, you can add subfolders under them. Just click on the More options ••• button next to the folder, select the Add folder option and do the same as you would add a folder.
Once the folders are in place, you can go ahead and add individual or multiple files. If your folder is empty, you will find the circular Drag and drop area at the center with an upload option inside. You can either do the common drag-and-drop files from your computer or click on the upload button and use the file explorer to select your files.
Similar to adding a subfolder, you can also use the left navigation bar to add files using the More options ••• button and then Add files option.
Increase in file size limit for upload
We’ve now increased the limit of individual and bulk file sizes being uploaded into the Drive.
New file size limit
- Single file upload – The maximum file size is 150MB per file
- Multiple files upload – The maximum combined size of all the files selected should be no more than 160MB
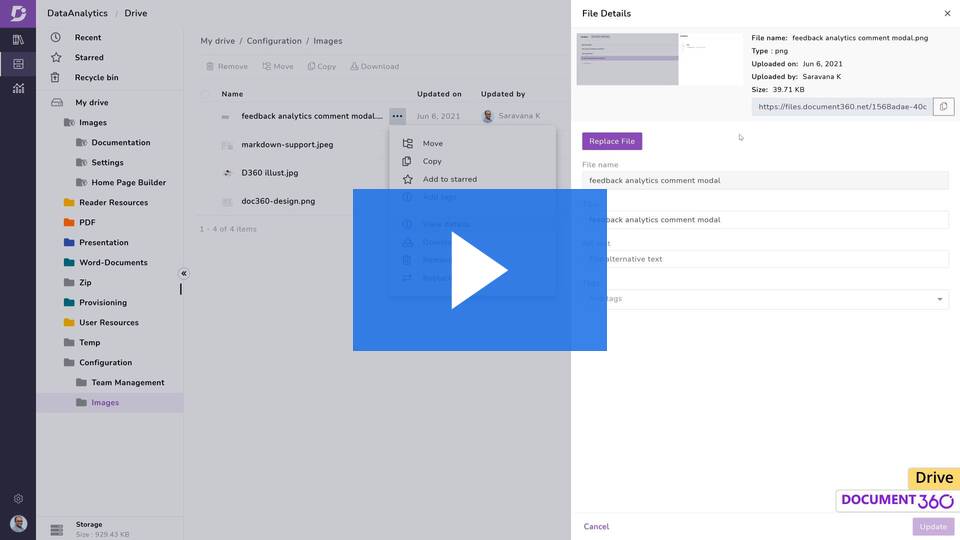
#3 File info
Once the files are uploaded, you can view the files along with info such as name, updated on, updated by, file size, and tag. This would be visible in columns only when the view is in List style.
You can also view more sorted and detailed file info by clicking on the file. A side-blade window would appear containing all the above-mentioned details along with the file URL, Meta Title, and Alt text (if it’s an image file). For image files, you can view a small thumbnail preview.

#4 Easy file swap
You can replace files of the same extension and type (ex. Jpeg, .pdf, .png, and more) with the same file name and metadata. This comes in handy when you want to update or replace a certain file when the file is being used in several articles. Instead of adding the new file to Drive and replacing it by editing each article, you can do a file replace and the new file change would be reflected in all the articles.
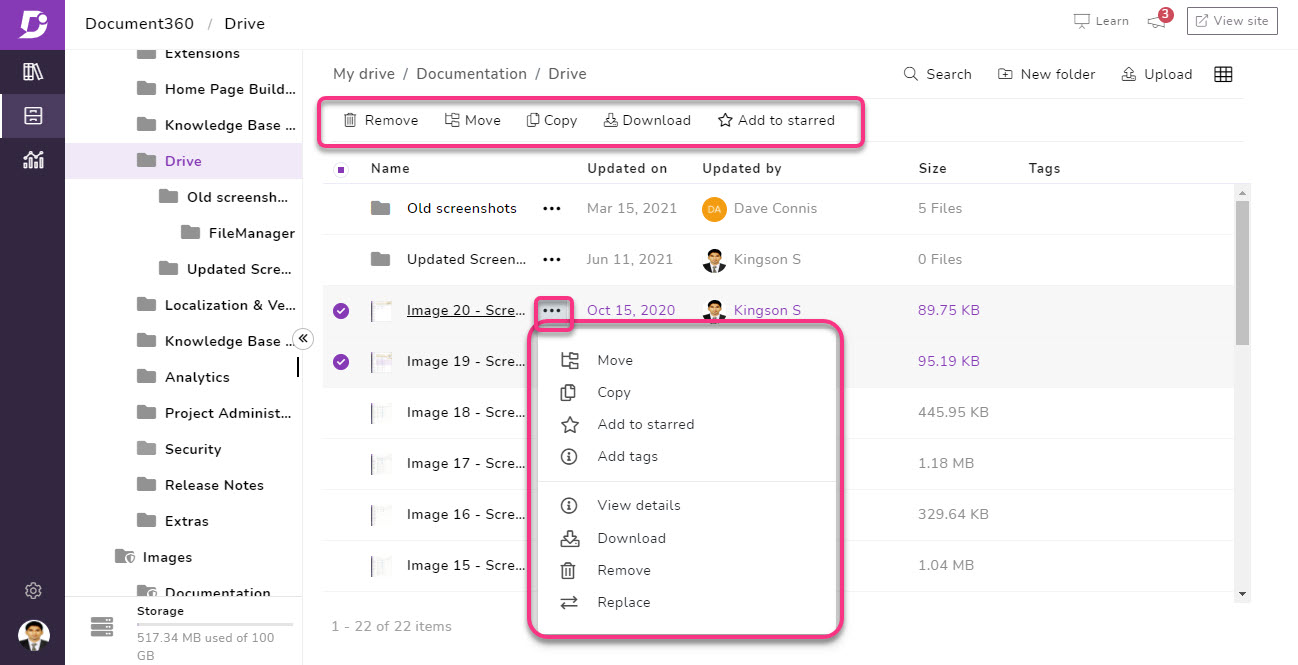
#5 File actions
You can perform all the file actions you usually do in any file explorer. Just click on the More options ••• button next to the file;
- You can move the file in or out of folders
- You can copy the file
- You can add your file to Starred folder. If you use some files more often and don’t want to search for them each time, you can add them to the starred folder. This folder would be easily accessible at the very top of the left folder navigation bar.
- You can add file tags. This would make it easier for you to identify or search and retrieve a particular set of files
- You can view details of the file as explained in the previous file info section
- You can download the file onto your local storage
- You can remove or delete the file (The removed files would be thrown in the recycle bin folder. You can choose to retrieve files in case of accidental deletion)
You can either perform these actions on an individual file or as a bulk operation on multiple files.
#6 Recycle bin
When handling a huge quantity of files, mishaps like accidental deletions are bound to happen. To address this, we’ve brought in the Recycle bin. The name and the function are self-explanatory. When you remove or delete a file from any of the folders, it will be moved to the recycle bin folder.
The recycle bin folder can be accessed at the very top of the folder navigation bar along with recent and starred folders.
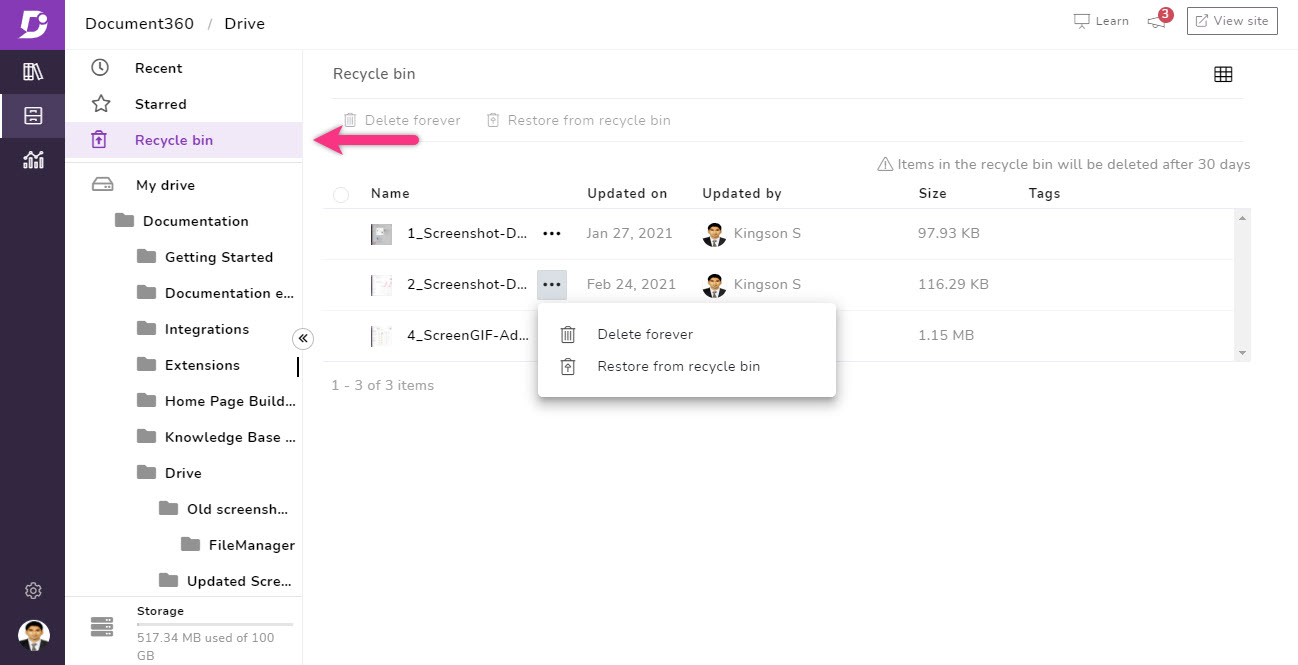
If you have made any accidental file deletions, you can click on the Recycle bin folder, select the mistaken file, and click on ‘Restore from recycle bin’.
You don’t need to worry about files in the recycle bin taking up your storage space. If you are sure you don’t need the file in the recycle bin, you can use the ‘Delete forever’ in more option. If not the file would be automatically flushed out (permanently deleted) after 30 days.
Check out the new Document360 Drive feature. Give Document360 a try!
GET STARTED
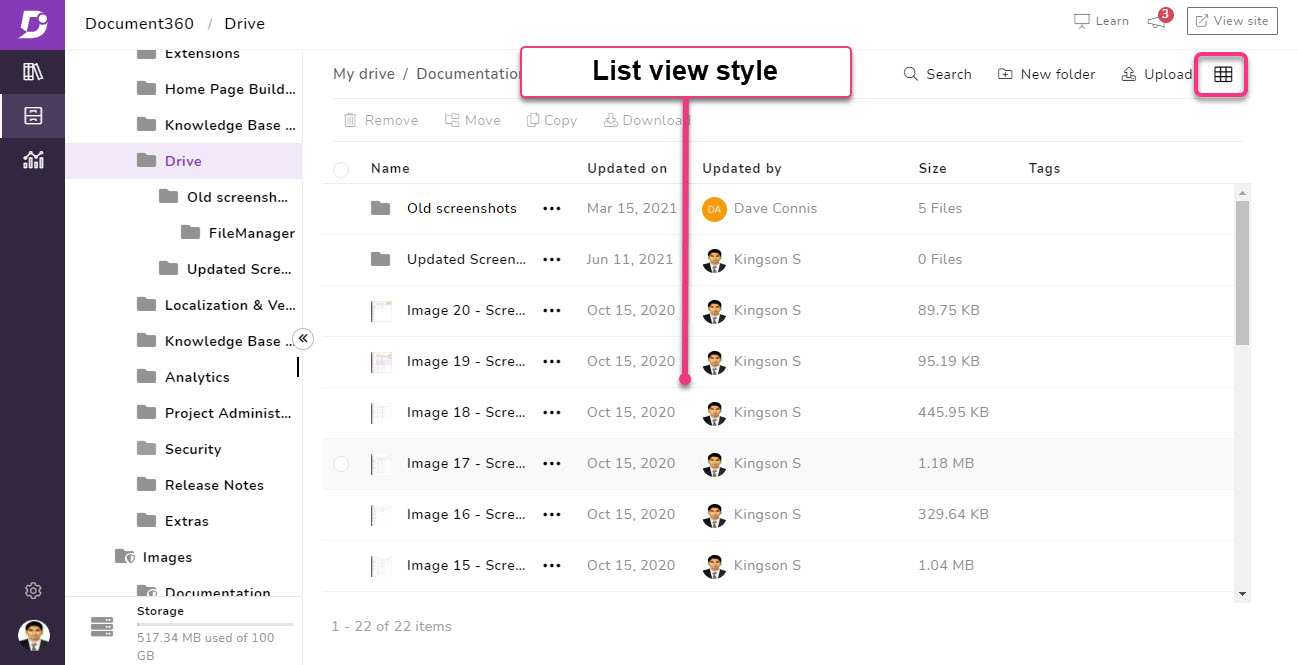
#7 File view style
You can select from two file view styles, each with its own functions and aesthetic appeal.
List style
By default, the list style would be used. In the list style, you can view the additional file info adjacent to the files with a tiny thumbnail. You can adjust the length of each of the columns containing file info.
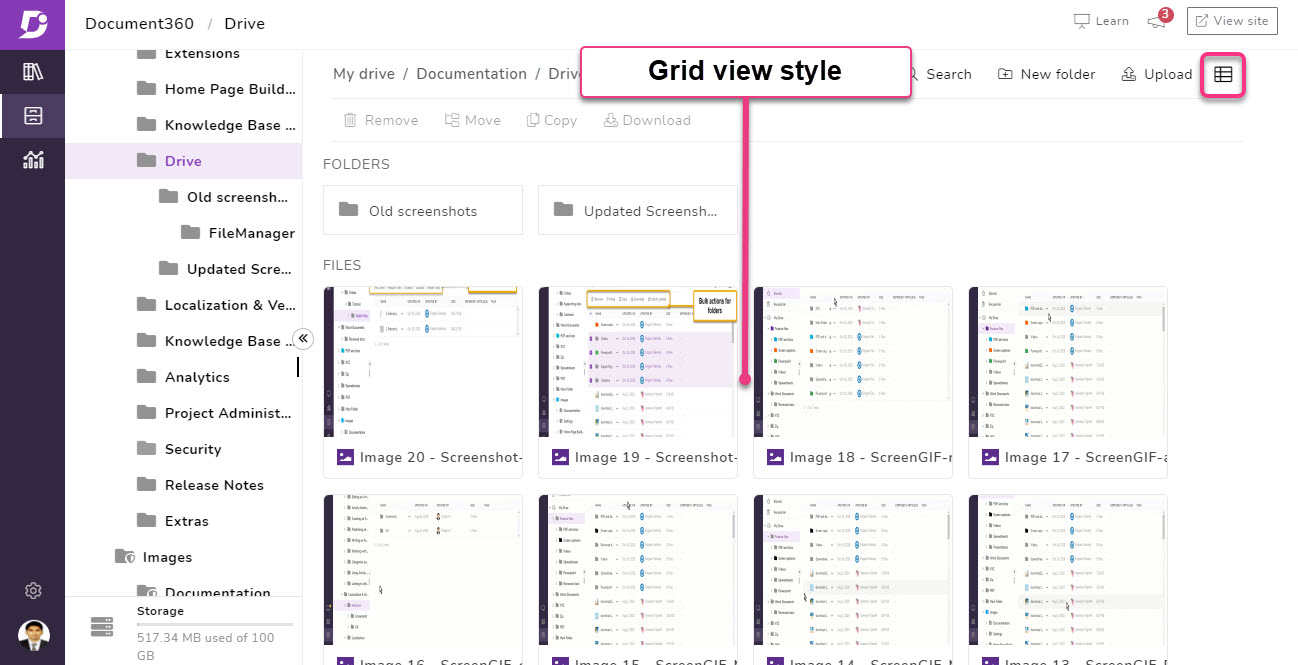
Grid style
You can also choose to change the file view to grid style using the grid icon on the top right corner, next to the ‘New folder button. The Grid view looks very elaborate; however, all the file info would not be visible along with the file.
You need to click on the file to view it. Also, one major difference is the file actions; you can only access it when you select the file. The actions move, copy, remove, download, and add to starred would be available at the top of the frame.
#8 Search files using filters
When you have hundreds of files and folders, the easiest way to retrieve a file is to use the search functionality. Click on the search icon at the top, type in the file name, and the results will be narrowed down as you type.
This is fairly easy if you know and remember the file name. If you don’t, you can type in keywords related to the file that can be found in the Name, Meta title, or Alt text to easily retrieve your file.
Search Filters
Let’s say you have a vague idea of the file you’re looking for but don’t exactly remember any keyword particulars. Don’t worry; make use of the different search filter options available.
- You can filter files based on the Updated date using time frames such as 7 days, 30 days, 3 months, and 1 year or you can select specific dates to search from
- You can filter by the Updated by a specific person or account data. Most of the time you’re bound to have multiple users working on different roles in the project, and the Drive is common to the project. You can select one or multiple contributors in the search filter
- You can filter with File types such as images, word, excel, ppt, pdf, video, audio, folders, or others. Select any one or multiple file types to filter your search
- You can also filter using the Tags feature. Search from a compilation of files under one or multiple tags.

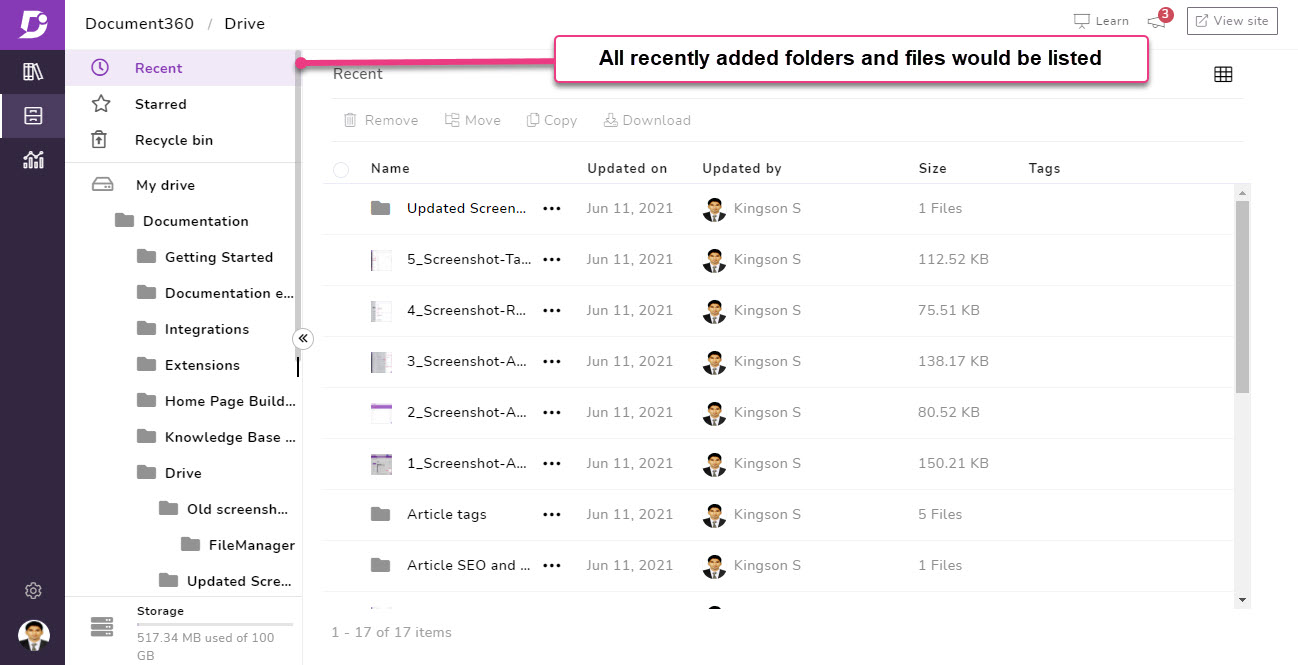
#9 Recent files
We have also added the ‘Recent folder’ to make it easier for quick access users. This dynamic folder would be populated with files and folders based on the latest addition or upload.
Most of the time editors upload files and subsequently use them in the documentation. This comes in handy as they don’t have to look for the latest files uploaded into any of the folders; they can find it by clicking on Recent at the very top of the left-side folder navigation bar.
#10 View any file’s dependent articles on a dedicated viewer
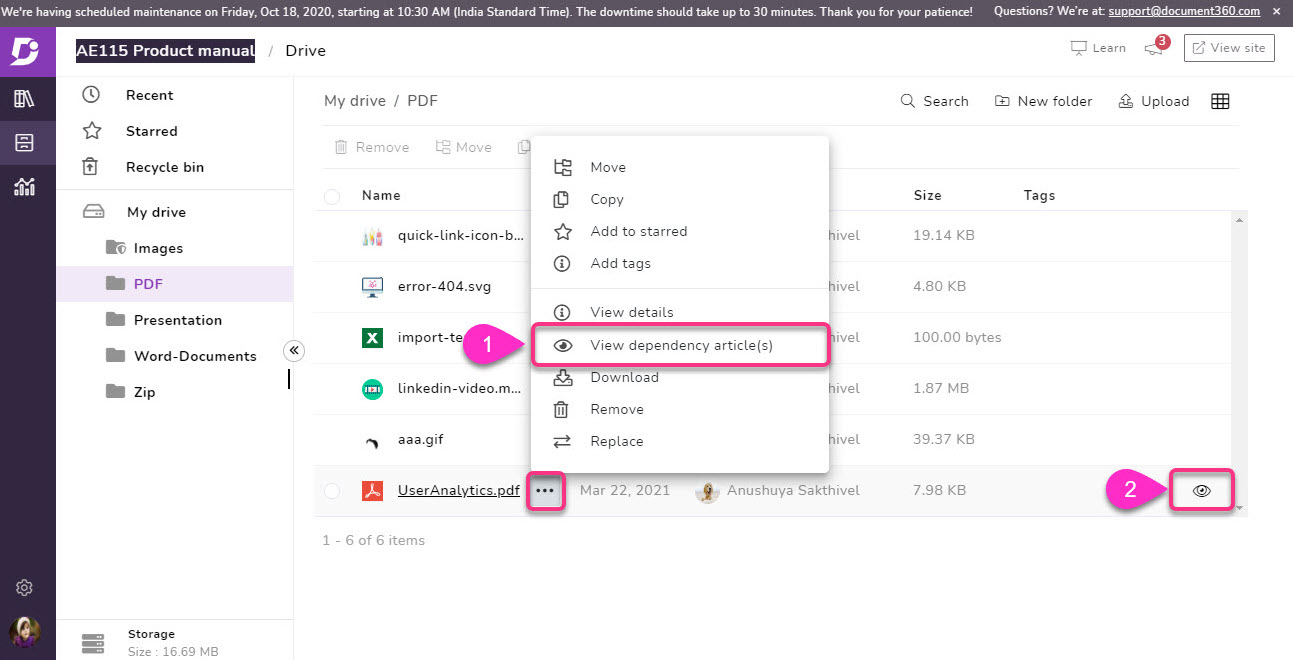
You can now view the dependency articles/category pages for individual files on your Document360 Drive in a dedicated file dependency viewer blade. This feature is extremely useful and addresses customers’ pain when using other third-party cloud storage to manage their knowledge base assets. Here is one such instance.
Have you ever accidentally deleted an image or a doc file from your Drive? Only to realize (mostly after the Links status validation reports the broken media file link) that the deleted file was added or attached in one or more articles/category pages in your knowledge base. This causes a huge deal of complication in restoring the file and fixing the broken links. One consolation is that you can retrieve the file from the Drive’s Recycle bin, but this has to be done within 30 days of the delete action.
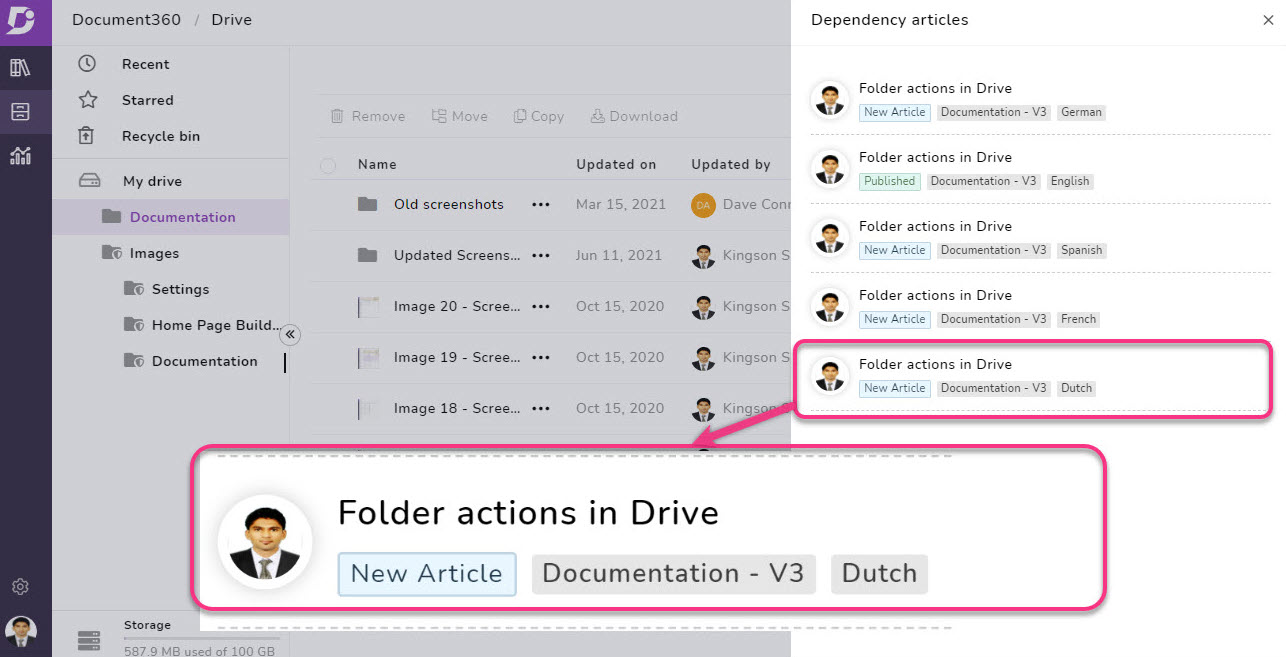
With the introduction of the file dependency viewer, you can check for any dependencies before deciding to delete the file. View information such as a list of dependent articles/pages, the name, publish status and link of the article/page, the contributor, the project version, and the version language.
#11 Accessing drive files from the document editor
The quick access for retrieving and inserting files from the drive into your document editor is easy. Irrespective of the document editor (markdown or WYSIWYG) you’re writing on, you can insert images or any other file type.
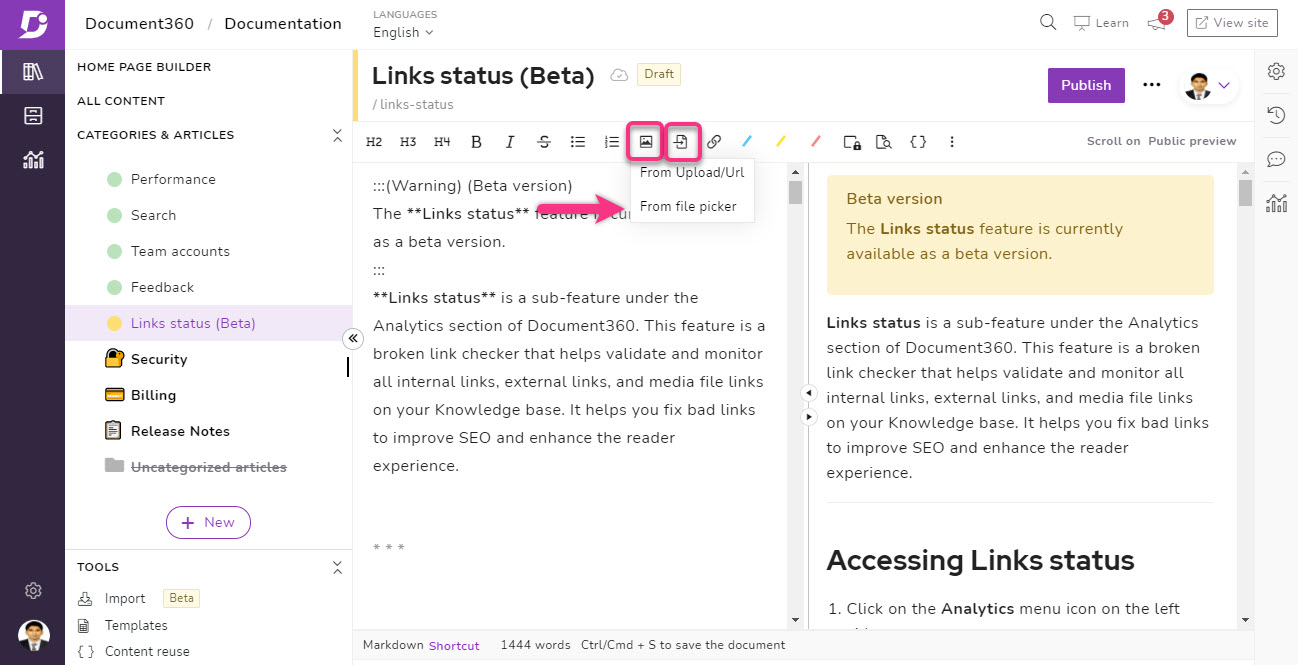
You can find the Insert image control in the toolbar at the top with all the different formatting. Click on the Insert image and select ‘From file picker’. The drive folder will open for you to select your required image. Also, only the image file types will be displayed when you click on this option. For all other types of files, click on the Insert file option in the toolbar.
To attach supporting files at the end of your article, Click on the article settings icon → attachment and select the file. These attachments would appear at the bottom of the published article.
Why a dedicated Drive for a knowledge base makes sense?
Imagine maintaining local or third-party cloud storage for the hundreds of files and digital assets used in your knowledge base. Every time you make an update, add files or retrieve them, it is going to be a hectic process. And if you decide to have local storage, mishaps and security concerns are always possible.
Using the Document360 Drive addresses these issues and helps you with effortless file management of all knowledge base assets. You can choose your drive storage capacity based on the different subscription tiers. Also, you can choose to stay in your current plan and opt for additional storage by unit GB you require. Go ahead and experience the all-new Document360 Drive!

Check out this head-to-head comparison between Document360 and its Alternatives. You can also read more about how Document360 compares to its competition.